Building Your Own Compost Pile
Main_Content
General Composting Rules

- The composting pile should be at least 1 cubic yard (3' x 3' x 3'). Ideal size is a 3 to 5 foot square.
- Locate the composting pile on level, well-drained ground near a water source.
- Stay away from wooden fences and buildings.
- Don’t set up over shallow tree roots.
- Mix Greens (for nitrogen) with Browns (for carbon) at a 2:1 Green/Brown ratio.
- Moisten materials as you add them and leave a concave depression at the top of the pile to capture rain. The composting pile should be kept about as damp as a wrung out sponge. It is a good idea to cover the composting pile during periods of very high moisture.
- Add water as needed to maintain correct moisture.
- Turn, fluff or aerate the composting pile every week.
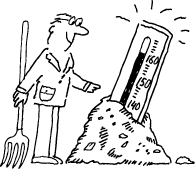
- The composting is complete (approximately 3 to 6 months) when it is dark brown-black, crumbly and sweet smelling. The temperature of the pile will also drop to ambient air temperature from a composting temperature of 120° - 150° F (48° - 66° C) when composting is complete.
- Age one month after removal from your bin before using as a soil amendment (it should be fully decomposed!).
| Odor |
Turn more frequently, add Browns if necessary |
| Pile too wet |
Turn more frequently, add Browns if necessary |
| Pile does not get hot |
Pile too small |
| Organics not degrading |
Check moisture, turn more frequently, add Greens, fresh manure, blood meal or urea |
| Rodents |
Remove and stop adding food scraps, turn more frequently and keep moist |
| Pets |
Bury food scraps under one foot of material and put pallet on top as lid |
| Insects |
Keep moist and turn more frequently |
Building a Composting Pile
- A composting pile is a simple heap of yard waste.
- In order to keep the pile manageable, try to limit the size to 5 feet high and 5 feet wide.
- Contain the heap by piling it against an existing wire fence or digging a 10 – 15 inch pit beneath it.
Building a Portable Composting Bin

- A portable composting bin is best made of woven wire (e.g., hardware cloth with ½" openings).
- Need from 11 ft. to 23 ft. of hardware cloth 3 ft. wide.
- Tie the ends together with hooks or wire.
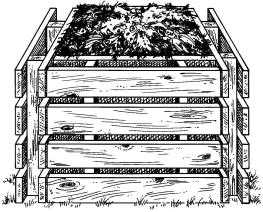
- You can also build a framed composting bin with treated lumber and hardware cloth.
- Remember to try to limit the framed bin's size to 5' x 5' x 5' with a minimum of 3' x 3' x 3'.
Building a Pallet Bin
- Need 5 pallets with slat spacing of ½" – 1".
- Place 1 pallet with slats up on the ground.
 Arrange the remaining pallets upright (short sides up) around each side of the base to form a box.
- Attach the sides at each corner with wire, coat hangers, rope, etc.
- Sides last 4 to 6 years; replace as needed.
- Bottom lasts 1 to 2 years; drop another fresh pallet over the old base when needed.
- By using a total of 9 pallets you can transform the pallet bin into a multi-bin unit.
- Add a 2nd bottom pallet next to the side of the 1st bin.
- Fasten the 3 additional pallets around it. Making sure it is tied into the 1st bin.
- Use the 2nd bin to aerate the composting pile by move the composting pile from 1 side to the other.
- By adding a 3rd bin (4 additional pallets), you can also have a bin to store the finished compost in while it cures for the month after composting is complete.
Other Bins
- In addition to the bins you make yourself, there are a number of ready-made bins currently on the market and available at local stores or through your County's recycling office.
For more information, contact The Waste Diversion and Utilization Program at 410-537-3314..